- Introduction
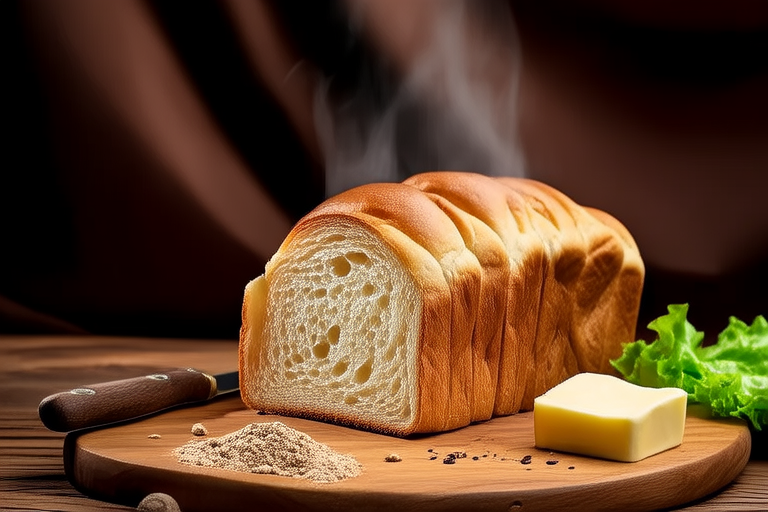
Fluffy Homestyle Bread from Scratch
Welcome to my culinary blog, where we explore the art of baking and creating delicious homemade bread. Today, we’re delving into the heartwarming world of Fluffy Homestyle Bread from Scratch. This recipe is not just about making bread; it’s about connecting with the simplicity and warmth that only homemade bread can offer. Whether you’re a seasoned baker or a beginner looking to expand your skills, this guide will walk you through every step of the process, ensuring you end up with a loaf that is light, airy, and full of flavor.
Baking bread from scratch might seem daunting at first, but with the right techniques and ingredients, it becomes an incredibly rewarding experience. The smell of freshly baked bread filling your kitchen is something that never gets old, and the satisfaction of knowing you’ve created something so wholesome is unmatched. In this recipe, we’ll focus on achieving the perfect balance between texture and taste, ensuring that each slice is fluffy and inviting.
- Ingredients
To make the perfect loaf of Fluffy Homestyle Bread from Scratch, you’ll need the following ingredients:
- 1 packet (2 1/4 teaspoons) active dry yeast: Yeast is the magic ingredient that makes bread rise. It feeds on sugars in the dough, producing carbon dioxide bubbles that give the bread its light and airy texture.
- 1 cup warm water (110°F to 115°F): The temperature of the water is crucial. If it’s too hot, it can kill the yeast; if it’s too cold, the yeast won’t activate properly.
- 3 tablespoons sugar: Sugar provides food for the yeast and also adds a touch of sweetness to the bread.
- 1 teaspoon salt: Salt enhances the flavors in the bread and helps control the growth of the yeast.
- 3 tablespoons unsalted butter, melted: Butter adds richness and a golden crust to the bread. Make sure it’s melted but not hot.
- 4 cups all-purpose flour: All-purpose flour provides the structure for the bread. You can substitute with bread flour for a chewier texture.
- 1 large egg, beaten: The egg helps bind the ingredients together and gives the bread a slightly richer flavor.
- Optional: 1 tablespoon honey or molasses: Adding a bit of honey or molasses can enhance the flavor of the bread and add a hint of caramelization to the crust.
- Equipment
In addition to the ingredients, you’ll need the following equipment:
- Mixing bowl: A large mixing bowl is essential for combining all the ingredients.
- Whisk: A whisk is great for dissolving the yeast in warm water.
- Measuring cups and spoons: Accurate measurements are key to successful baking.
- Electric mixer with a dough hook attachment: While you can knead the dough by hand, using a mixer with a dough hook attachment speeds up the process and ensures a more consistent texture.
- Large baking sheet or bread pan: For shaping and baking the bread.
- Proofing basket or bowl: To help shape the bread before the final rise.
- Sharp knife: For scoring the bread before baking.
- Oven thermometer: To ensure your oven is at the correct temperature.
- Step-by-Step Instructions
Step 1: Activate the Yeast
Start by activating the yeast. In a small bowl, combine the warm water and sugar. Sprinkle the yeast over the top and let it sit for about 5 minutes until the mixture becomes frothy. This indicates that the yeast is alive and ready to work its magic.
Step 2: Mix the Dough
In a large mixing bowl, combine the activated yeast mixture, melted butter, salt, and beaten egg. Stir well to incorporate everything. Gradually add the flour, one cup at a time, mixing until a shaggy dough forms. At this point, the dough may still be a bit sticky, but don’t worry—it will come together as you knead.
Step 3: Knead the Dough
If you’re using a stand mixer, attach the dough hook and knead the dough on medium speed for about 8-10 minutes. If you prefer to knead by hand, turn the dough out onto a lightly floured surface and knead for about 10 minutes, until the dough becomes smooth and elastic. The dough should no longer stick to your hands or the surface.
Step 4: First Rise
Once the dough has been kneaded, place it in a lightly oiled bowl, turning it once to coat the surface with oil. Cover the bowl with a clean kitchen towel or plastic wrap and let it rise in a warm, draft-free area for about 1 hour, or until it has doubled in size.
Step 5: Shape the Dough
After the first rise, punch down the dough to release any air bubbles. Turn it out onto a lightly floured surface and shape it into a round or oblong loaf, depending on your preference. Place the shaped dough into a proofing basket or a bowl lined with a clean kitchen towel dusted with flour. Let it rise again for another 30-45 minutes, or until it has puffed up slightly.
Step 6: Preheat the Oven and Prepare the Baking Sheet
While the dough is rising for the second time, preheat your oven to 375°F (190°C). Line a baking sheet with parchment paper or lightly grease it with oil. If you’re using a bread pan, grease it thoroughly as well.
Step 7: Bake the Bread
Transfer the risen dough to the prepared baking sheet or bread pan. If you’re using a free-form loaf, score the top of the dough with a sharp knife to allow for expansion during baking. Bake the bread for about 30-35 minutes, or until the crust is golden brown and the bottom of the loaf sounds hollow when tapped.
Step 8: Cool and Serve
Remove the bread from the oven and let it cool on a wire rack for at least 15-20 minutes before slicing. This allows the internal structure of the bread to set, resulting in cleaner slices. Serve warm or at room temperature with your favorite spreads, soups, or simply on its own.
- Tips and Variations
Baking bread can be a deeply personal experience, and there are countless ways to customize this basic recipe. Here are some tips and variations to consider:
- Adding Seeds or Nuts: For added texture and nutrition, sprinkle sesame seeds, poppy seeds, or chopped nuts on top of the dough before baking.
- Herbs and Spices: Infuse your bread with herbs like rosemary, thyme, or basil, or add a pinch of cinnamon or nutmeg for a sweet twist.
- Whole Grain Options: Substitute some of the all-purpose flour with whole wheat flour, rye flour, or oat flour for a healthier, more flavorful loaf.
- Gluten-Free Option: If you’re gluten intolerant, you can use a gluten-free all-purpose flour blend and adjust the liquid content accordingly. Be sure to use gluten-free yeast and check the compatibility of other ingredients.
- Freezing the Dough: If you want to bake later, you can freeze the dough after the first rise. Wrap it tightly in plastic wrap and store it in the freezer for up to 2 months. Thaw it overnight in the refrigerator before proceeding with the second rise and baking.
- Conclusion
Making Fluffy Homestyle Bread from Scratch is a journey that connects us with the simple pleasures of life. From the moment you mix the ingredients to the final slice, every step is filled with possibilities for creativity and enjoyment. Whether you’re sharing it with family, enjoying it for breakfast, or simply savoring a moment of peace, this bread is sure to bring warmth and happiness to your table. Happy baking!


